So, perhaps some graphic black/white combo with one solid, either a green or pink because we're children of the 80s!
Sunday, August 12, 2007
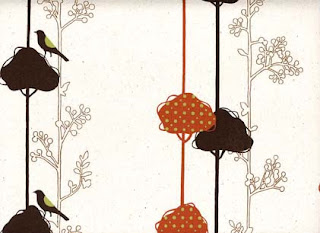
So, Lisa, aka Oh, Judy, is having a baby girl. I thought some of these fabrics would be great for her baby quilt (since I started this da-- tradition of making pieced quilts for my nieces and nephews). Check them out:
So, perhaps some graphic black/white combo with one solid, either a green or pink because we're children of the 80s!
So, perhaps some graphic black/white combo with one solid, either a green or pink because we're children of the 80s!


Friday, August 03, 2007
Do you know about Company C? I've been looking for a rug for my living room. I can't afford these, but SOMEONE, please buy one and I'll come to your house and oooohh and ahhhh! These are my favorites:
 | ||||
I'd like to show you more favorites, but I have this new iMac and I don't know how to copy photos from online without my right clicker-help me! Anyway, check out the website. | ||||


Thursday, August 02, 2007
Baby Blankets
I've been going gang-busters for baby blankets. Well, people keep having babies and for lack of a better baby gift, I keep sewing. Who doesn't love a cuddly blanket? This size 1 to 1 1/4 yds, so roughly 45" X 45", is even perfect for a toddler or in the car. So, a couple of options here, both simple: Rag edge and Decorative edge. Here are the directions:
Rag Edge
Get 1 or 1 1/4 yds each of two different kinds of FLANNEL fabric. DON'T prewash!!! (Two flannels work better than one simple cotton and one flannel although it does work, it's just not as fuzzy.) Iron if really wrinkled. Lay out on top of each other-WRONG sides facing- and trim. You want to cut it to a blanket size you want (see how easy this is? Only the cutting counter ladies have to measure!) Stitch a straight stitch 1/2 inch from the edge-all the way around the blanket. Clip perpendicular to this stitch approximately 1/8 inch apart all the way around the quilt.
  Wash and dry! Done! Takes about an hour (if no one is begging for carrots and Ranch dressing!)

Decorative Edge (photos from first posting)
Get 1 to 1 1/4 yds of fabric. I like one flannel and one cotton for summer babies and two different flannels for winter babies. I like to prewash so it's baby-ready when you give it as a gift. When washed and ironed (if needed), lay RIGHT sides together and trim to size desired. Stitch 1/2 inch from edge ALMOST all the way around. Leave an opening so you can turn it right side out. Then, turn it right side out (clip your corners first). Press the edges so everything lines up nicely. Then add a decorative edge by 1) rick rack 2) decorative stitch 3) ribbon 4) upholstery trim 5) puff paint-just seeing if anyone is actually reading this! Under no circumstances EVER use puff paint.
RICK RACK: Stitch in a straight line through the center. Don't try to follow all the squiggles. I put the edge of the rick rack about 1/8 inch from the edge of the blanket.
DECORATIVE STICH: Check out some of the stitches on your machine that you never use. Do it in a contrasting color. I stitch 1/2 inch from the edge of the blanket.
RIBBON: Haven't done this, but would be cute. Use a heavier ribbon, such as grosgrain. Don't use a sheer for obvious reasons.
UPHOLSTERY TRIM: I've seen pom pom fringe and heavier fringes. Just watch out that the baby can't pull them off and choke.
A few more notes:
The blanket can tend to shift after washing. You may want to stitch a shape in the center of the blanket to hold it together. I've followed the design in the fabric before and that works well and doesn't stand out too much.
You can add a light cotton batting if you want more of a quilt feel than a blanket, but you will need to quilt it-with the spacing recommended by the manufacturer.
BURP CLOTHS: I'll get 1 1/2 yds of fabric and use 1 1/4 for the blanket and the rest to make a burp cloth or cloths. Just make them the same way as the blanket. A friend gave me the perfect size-9" by 18". I cut that size, but if you have the fabric you may want to cut an inch larger.
Now, go make a baby happy!
I've been going gang-busters for baby blankets. Well, people keep having babies and for lack of a better baby gift, I keep sewing. Who doesn't love a cuddly blanket? This size 1 to 1 1/4 yds, so roughly 45" X 45", is even perfect for a toddler or in the car. So, a couple of options here, both simple: Rag edge and Decorative edge. Here are the directions:
Rag Edge
Get 1 or 1 1/4 yds each of two different kinds of FLANNEL fabric. DON'T prewash!!! (Two flannels work better than one simple cotton and one flannel although it does work, it's just not as fuzzy.) Iron if really wrinkled. Lay out on top of each other-WRONG sides facing- and trim. You want to cut it to a blanket size you want (see how easy this is? Only the cutting counter ladies have to measure!) Stitch a straight stitch 1/2 inch from the edge-all the way around the blanket.
 Clip perpendicular to this stitch approximately 1/8 inch apart all the way around the quilt.
  Wash and dry! Done! Takes about an hour (if no one is begging for carrots and Ranch dressing!)
Decorative Edge (photos from first posting)
Get 1 to 1 1/4 yds of fabric. I like one flannel and one cotton for summer babies and two different flannels for winter babies. I like to prewash so it's baby-ready when you give it as a gift. When washed and ironed (if needed), lay RIGHT sides together and trim to size desired. Stitch 1/2 inch from edge ALMOST all the way around. Leave an opening so you can turn it right side out. Then, turn it right side out (clip your corners first). Press the edges so everything lines up nicely. Then add a decorative edge by 1) rick rack 2) decorative stitch 3) ribbon 4) upholstery trim 5) puff paint-just seeing if anyone is actually reading this! Under no circumstances EVER use puff paint.
RICK RACK: Stitch in a straight line through the center. Don't try to follow all the squiggles. I put the edge of the rick rack about 1/8 inch from the edge of the blanket.
DECORATIVE STICH: Check out some of the stitches on your machine that you never use. Do it in a contrasting color. I stitch 1/2 inch from the edge of the blanket.
RIBBON: Haven't done this, but would be cute. Use a heavier ribbon, such as grosgrain. Don't use a sheer for obvious reasons.
UPHOLSTERY TRIM: I've seen pom pom fringe and heavier fringes. Just watch out that the baby can't pull them off and choke.
A few more notes:
The blanket can tend to shift after washing. You may want to stitch a shape in the center of the blanket to hold it together. I've followed the design in the fabric before and that works well and doesn't stand out too much.
You can add a light cotton batting if you want more of a quilt feel than a blanket, but you will need to quilt it-with the spacing recommended by the manufacturer.
BURP CLOTHS: I'll get 1 1/2 yds of fabric and use 1 1/4 for the blanket and the rest to make a burp cloth or cloths. Just make them the same way as the blanket. A friend gave me the perfect size-9" by 18". I cut that size, but if you have the fabric you may want to cut an inch larger.

Now, go make a baby happy!
Friday, July 20, 2007
Momming It
So, I've been busy doing the following:
-painting a piano
-painting a piano bench
-painting a coffee table (two colors with crackle effect)
-baking banana bread
-sewing a baby blanket
-sewing a ottoman slipcover
-designing embroidery picture for pillows (4)
-running
-biking
-going to the library
-going to swimming lessons (mom and tot w/Syd)
-going to dance camp (for the girls, not me!)
-buying said coffee table and piano bench at antique store
-choosing wallpaper
-sewing drapes
-choosing and installing (husband did, I helped) new lighting for dining room
-making breakfast, lunch, and dinner
-cleaning bathrooms
-vacuuming
-reading to children
-watching DVRed shows (thank you little box!)
-going on walks
-otherwise "momming it"
See how "writing a new sewing blog" wasn't in there? Yeah, me too! Now, go do something. I think I'll sit down for a little while!
So, I've been busy doing the following:
-painting a piano
-painting a piano bench
-painting a coffee table (two colors with crackle effect)
-baking banana bread
-sewing a baby blanket
-sewing a ottoman slipcover
-designing embroidery picture for pillows (4)
-running
-biking
-going to the library
-going to swimming lessons (mom and tot w/Syd)
-going to dance camp (for the girls, not me!)
-buying said coffee table and piano bench at antique store
-choosing wallpaper
-sewing drapes
-choosing and installing (husband did, I helped) new lighting for dining room
-making breakfast, lunch, and dinner
-cleaning bathrooms
-vacuuming
-reading to children
-watching DVRed shows (thank you little box!)
-going on walks
-otherwise "momming it"
See how "writing a new sewing blog" wasn't in there? Yeah, me too! Now, go do something. I think I'll sit down for a little while!
Friday, July 06, 2007
Happy Fourth of July!
 So now I don't have enough fabric for matching dresses. Yeah, it's that bad. On the upside, I always have the supplies when it's time for a project!

Enjoy this next week and don't feel guilty for the things you're not doing because we're always collecting ideas! And just like Uncle Rico says, "You might as well be doing something while you're doing nothing!"
I'm a little late, but what's new? I try, but apparently don't care enough to do things on time. At least I'm honest with myself. So, here's the tie-in sewing advice for this week: Be honest with what you can accomplish and don't feel guilty otherwise. (I think that applies to EVERYTHING we want to take on.)
For example, I have some really cute fabric for little summer shirts for my girls. It is washed and tucked away neatly, probably never to be made into anything this summer-we'll see. I also have some cute fabric to make matching dresses for the girls last summer, oh no, the summer before I had another girl!
So now I don't have enough fabric for matching dresses. Yeah, it's that bad. On the upside, I always have the supplies when it's time for a project!How can I stay inside and sew with sunsets like this? I took this a couple streets from my house-in my car! Someday I'll make a sunset quilt-all the colors of the sky.
Enjoy this next week and don't feel guilty for the things you're not doing because we're always collecting ideas! And just like Uncle Rico says, "You might as well be doing something while you're doing nothing!"
Tuesday, June 26, 2007
Fix Your Shirt!


2. I gathered the back. I measured a piece of 1/4 inch wide elastic to fit across my back when stretched. I marked a few inches from the side of the shirt on the inside of the shirt, about bra strap height. I sewed in the elastic on one side, make sure to backstitch to tack it in. I then stretched the elastic across to the other mark while sewing. Voile! Gathered by the elastic. Be sure to backstitch so it doesn't snap back at you!

 But I forgot to take pictures of the pillows-can anyone guess why? It has something to do with a 20 month old with a really good arm-ouch!
Now it may seem like I buy a lot of clothes that don't fit, but it's just that my body is so unique! Not really--I tried on the pants and they fit in the store. And this super great shirt was a gift from my mom.
My dad was in Guadalajara, Mexico for 7 weeks as director of study abroad, mom visited and brought gifts. I did ask for a embroidered dress (yes, like to old Mexican ladies wear) and she delivered! (I wore it on the front porch and the neighbors laughed.) But this shirt was a surprise. I cannot overstate how much I love this shirt, however, it was a little boxy so I gave it some shape. Here's how it is done:
1. I pleated the sleeves. I folded the sleeve in half, measured down an inch from the point, and folded it open. I stitched it down with a coordinating thread.
2. I gathered the back. I measured a piece of 1/4 inch wide elastic to fit across my back when stretched. I marked a few inches from the side of the shirt on the inside of the shirt, about bra strap height. I sewed in the elastic on one side, make sure to backstitch to tack it in. I then stretched the elastic across to the other mark while sewing. Voile! Gathered by the elastic. Be sure to backstitch so it doesn't snap back at you!
I should have taken the sides in even more and I may, but that would require unpicking all that stitching! So, maybe I'll just get fat-cause that's another way to make your clothes fit!
Talk about getting fat.... one of the BEST cookies I've ever had was a Snickerdoodle from Harmon's bakery.
I finished one part of my media center pillow adventure:
But I forgot to take pictures of the pillows-can anyone guess why? It has something to do with a 20 month old with a really good arm-ouch! Here's the best photo I got:

See, cool pillows. I'll teach you how to make them, and how to stick the big white fluffy square inside!
I'll get photos of all of them-and share instructions for making pillows, eventually!
So, take away message this week: Buy clothes you like-fit doesn't matter because you can sew them or eat Snickerdoodles to make them fit!
Friday, June 22, 2007
Really Trying!
There are a couple of questions and projects that I want to get to. They are: 1) denim skirt from old jeans and 2) brightly colored quilt idea for Bek. However, this week I got a wild hair to go through my basement, which I haven't for about 5 years! and gather things for a garage sale. Crazy! I also have a lot of fabric and thought I'd get rid of some, but I didn't! I am getting rid of a microwave, futon chair (that is awesome!), and kitchen table among other crap. Come over and buy it!
I've also been holding off on other projects until I finish some pillows for my daughter's elementary school "media center, " but I prefer calling it the library. This is what part of the project looks like:

There are a couple of questions and projects that I want to get to. They are: 1) denim skirt from old jeans and 2) brightly colored quilt idea for Bek. However, this week I got a wild hair to go through my basement, which I haven't for about 5 years! and gather things for a garage sale. Crazy! I also have a lot of fabric and thought I'd get rid of some, but I didn't! I am getting rid of a microwave, futon chair (that is awesome!), and kitchen table among other crap. Come over and buy it!
I've also been holding off on other projects until I finish some pillows for my daughter's elementary school "media center, " but I prefer calling it the library. This is what part of the project looks like:

I bet you're intrigued and want to know what it will look like, well, sister, let me get through this weekend and I'll write something really exciting!
Monday, June 11, 2007
Fix your pants!
Summer! It's soooo hard to sew when it's nice outside. And since it's so nice all I want to wear are capris! Really, it's been gorgeous. So I bought some awesome designer (Gloria Vanderbilt) pants at Kohl's--I know, I'm such an old lady-it gets better! I wore them with the fam at Zion's National Park. .jpg) Here is me and Baby #3 in the backpack carrier and midway through the hike I noticed my pants were FALLING OFF!!! I couldn't wear my awesome orange cargo capris the rest of the trip. And when you're in the wild, you want to wear orange.
Here is me and Baby #3 in the backpack carrier and midway through the hike I noticed my pants were FALLING OFF!!! I couldn't wear my awesome orange cargo capris the rest of the trip. And when you're in the wild, you want to wear orange.
Here is me and Baby #3 in the backpack carrier and midway through the hike I noticed my pants were FALLING OFF!!! I couldn't wear my awesome orange cargo capris the rest of the trip. And when you're in the wild, you want to wear orange.You ask, What did you do Sewing Friend?
(First, I have to mention a belt wouldn't fix the problem because the belt loops in the front were not the same size as the belt loops in the back and nothing would fit through.)
I added elastic to the back casing to "grip" my back waist.
Step 1: Unpick the inside seam of your pants about 3 inches. Work from the side seams in the back and when you sew again, you won't see extra stitches.
Step 2: Sew in a length of elastic (I used 3/4 inch wide) on the side seam.

Step 3: Feed the elastic in the casing (space between the open seams.) I used this neat red plastic thing that allows you to pull elastic or ribbon or whatever through a casing.

Step 4: Pull through and adjust to just the right "grippiness" by trying on the pants. Pin elastic and stitch on other side seam. Trim excess elastic.

Step 5: Sew over where you unpicked the inside seam to close the casing.
Step 6: The finished product.
 Now back elastic is a bit old-lady, but while you're wearing it, the elastic stretches out and you can't tell
 -and your pants don't fall down (and you get to see a totally unflattering picture taken by myself while wearing the pants!)
Try this at home and have great fitting pants! Good luck and buy some orange pants-they rock!
Tuesday, June 05, 2007
Last Saturday, I ran in the Draper Trails Day 6 mile run. I just wanted to run on trails with other people because 1) I'm afraid of wildlife (there has been a Rocky Mountain sheep attack on one of our friends-he's okay) 2) I would rather someone else break through the cobwebs (lots of trees= lots of spiders!) and 3) I like to run outside! The first three miles UP A MOUNTAIN was tough, but then I flew downhill-it was a blast. After the race, while I was eating my Costco muffin (I deserved those 600 calories!) and orange slice, I heard my name--I got 3rd place! I got this great white ribbon:

Hey, I just wanted to enjoy the out of doors and wow, 3rd place! Now, many of you may be saying, "But Gina, 2nd place got a ribbon AND a loaf of Great Harvest bread." I say to that, "I run because I eat too much bread and I love ribbons!"
But it got me thinking....I often work on a sewing project just because I like it. Any accolades are great. But let me tell you, when you get 3rd place or when someone sees something you made and "oooohs" over it--same great feeling! You can do something someone else can't do, you can! So you should do it and maybe get a little lift from it!
Now that's not to say everything will go smoothly.
The race wasn't really 6 miles. I wore my GPS and it was actually 7.05 miles. Sometimes a project will take longer than we think.
I started out with some high school track team doing a little summer training. What was I thinking? I really thought I could keep up with 15 year old boys? Yeah, they ran too fast for me! It's okay to evaluate your project and save it for another day. I slowed down.
I latched on to a couple of women going a realistic pace and made some new friends. Find people who can work with you through the project.
At the top of the mountain, my husband and girls were waiting for me to cheer me on. Share your project with others for encouragement. It's okay if you're not finished yet!
I lagged behind my new friends because I talked with my family, so I had to run really fast to catch up with them. I kept them in sight and set my goal to beat them to the finish (I can be a friend while running, but I'm a competitor!) Set specific goals to get your project done in a timely manner.
I sprinted up the finishing hill with another lady on my heels-she wasn't going to catch me after all my hard work the last half of the race. Finish your project!
Now, if you're not going to sew something--go run!

Thursday, May 31, 2007
These Wing Friend

I do love birds! Many of you have noticed my blog could also be read as These Wing Friend. Now that you've found me, you know its The Sewing Friend. But let's talk about birds, there's some pretty hip stuff out there. I found most of this here. Enjoy!



Wednesday, May 30, 2007
I've often wondered why I like sewing so much. I have a lot of reasons (making something from "nothing," stress relief, sense of accomplishment, engaging the mind, skill building) but I think it boils down to connecting to the past and the future. My mom sewed and it reminds me of my happy childhood. I love the history of quilt-making. I enjoy working with my hands to make something, and not just something I'll eat! When you make something, it will remain behind long after we pass. That's why I make quilts for my nieces and nephews, although those early ones won't last because I had no idea what I was doing! However, there is a sense of connectedness and longevity from each project completed. Your "whatever" is out there.
I love vintage sewing stuff. I love rick rack and buttons and lace and ribbon. I inherited these old needle books from my husband's grandmother. I got some shadow boxes and included them with some of her rick rack and a thimble.


They hang on the wall above my sewing machine. I think of her when I sew. She gave me a set of Singer sewing books years before she died. The other day I found a note in one from the early 90s. It was from a girl thanking her for making a scarf to wear over a prom dress. A small thing, but important.
I think you need to have inspiration around you to choose projects that interest you. My love of rick rack has spilled over to baby blankets I make. Here are a few examples:

I also love reproduction prints. Check out the Repo Depot for some great prints. If you happen upon some fabric that you love, even if you don't have an immediate project in mind, buy as much as you can afford. For me, it's typically 2 yards--enough to make a skirt, shirt, or a majority part of a small quilt. I saw a Scandinavian print on a moderate quality fabric. I loved the colors and print and bought 5 yards (it was cheap!) I knew it wasn't heirloom quality, but I loved it. It inspired my sewing loft (pictures to come when it's clean!), but here are some pillows I made out of it:

I love vintage sewing stuff. I love rick rack and buttons and lace and ribbon. I inherited these old needle books from my husband's grandmother. I got some shadow boxes and included them with some of her rick rack and a thimble.
They hang on the wall above my sewing machine. I think of her when I sew. She gave me a set of Singer sewing books years before she died. The other day I found a note in one from the early 90s. It was from a girl thanking her for making a scarf to wear over a prom dress. A small thing, but important.
I think you need to have inspiration around you to choose projects that interest you. My love of rick rack has spilled over to baby blankets I make. Here are a few examples:
I also love reproduction prints. Check out the Repo Depot for some great prints. If you happen upon some fabric that you love, even if you don't have an immediate project in mind, buy as much as you can afford. For me, it's typically 2 yards--enough to make a skirt, shirt, or a majority part of a small quilt. I saw a Scandinavian print on a moderate quality fabric. I loved the colors and print and bought 5 yards (it was cheap!) I knew it wasn't heirloom quality, but I loved it. It inspired my sewing loft (pictures to come when it's clean!), but here are some pillows I made out of it:
The print was a striped fabric and I mitered it to make a square (a project for a later blog!) Even with all the choices out there, the primary colors are still my favorites.
Consider this week an object, picture, fabric swatch, or even music (anyone checked out the latest Maroon5?) that inspires you and set it in your field of vision. If you work with fabric that you love, you'll be more likely to work on it! Projects stuck in baskets don't finish themselves, trust me, I've tried! Let's start and finish something this week!
Saturday, May 12, 2007
We all have different kinds of friends. There's the one who gives great gifts. There's the one who has the best recipes. There's the friend who can find the greatest deals, or the one who is fun to shop with because she doesn't look at the prices. I have friends I run with, friends I eat with, friends I trade babysitting with, and friends I just like to listen to because they make sense.
I've discovered that I'm the "sewing friend." I've found myself mending simple things, making quilts and blankets, and sewing curtains and pillows for friends. I've taught some informal sewing classes to neighbors, but I mostly encourage friends to dust off their sewing machine and try something. I answer questions about sewing or fabric--and I love it.
and sewing curtains and pillows for friends. I've taught some informal sewing classes to neighbors, but I mostly encourage friends to dust off their sewing machine and try something. I answer questions about sewing or fabric--and I love it.I'd really like to start blogging on a consistent basis, but time evades me. So, keep checking and I'll get something going this summer 2007. I would like to share sewing projects, including simple gifts, home decor, and clothing.
But my real purpose here is to give you the confidence to try!! What's the worst that could happen? You throw something away and wasted a couple of hours, big deal! Next time you won't. (But a seam ripper is so great, and you can reuse your fabric in another project.)
You can, you can, you can--inspiration is all around us. Check out a couple of websites to whet your appetite for fabric and projecting.
Because seriously, you could make that.
Subscribe to:
Posts (Atom)